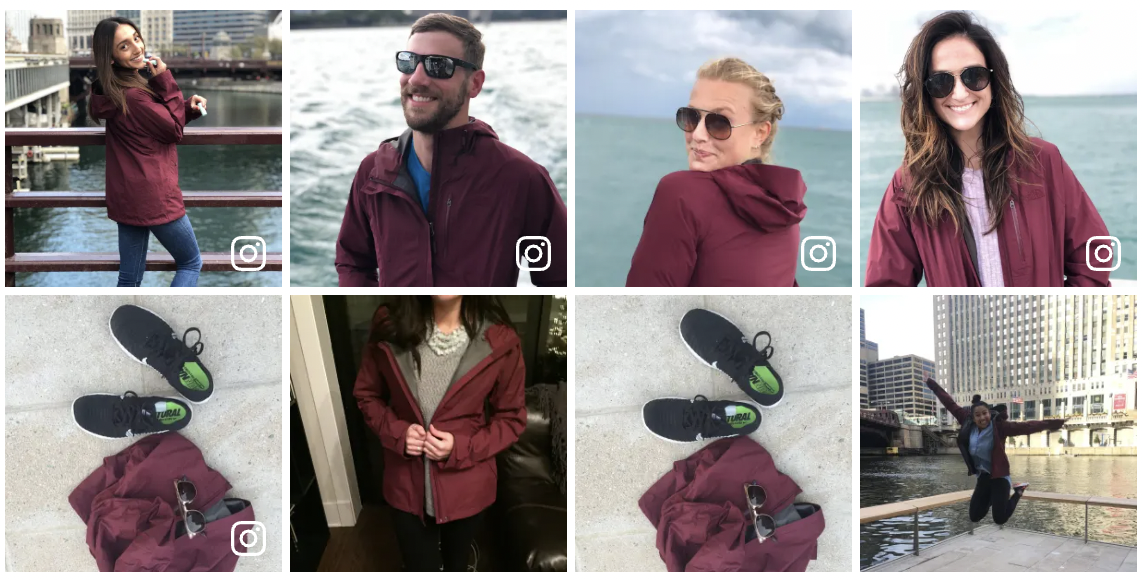
This article discusses how to implement the In Real Life (IRL) Gallery and the Shop All Page for Social Essential. To learn more about the IRL Gallery and the Shop All Page, click here.
This article contains the following sections:
- Adding the IRL Gallery
- Changing the Gallery Style via the Portal
- Changing the Gallery Style via the JavaScript
- Hashtag and Category Image Galleries
- Add Your Photo
- Adding the Shop All Page
Adding the IRL Gallery
The IRL Gallery is a JavaScript Snippet designed to pull in image and video content that has been collected from Instagram through a PowerSocial collection campaign. This code can be added to your homepage or any other section of your website where visual content is being featured. The recommended implementations of the IRL Snippet are as follows:
- Homepage
- Category Page
- Gallery Page
To add the IRL Snippet:
1. Ensure this feature has been enabled for your account. If you are unsure, contact your Implementation Team or Account Team.
2. Identify where on your website you want this code snippet to appear.
3. Install the IRL Snippet container:
- Copy and paste the following HTML element into your HTML page where you want the IRL Snippet to appear:
<div id="pr-irlsnippet"></div>
4. Install the IRL Snippet:
- Copy and paste the following code block at the bottom of your <body> tag
<script src="https://ui.powerreviews.com/stable/4.1/ui.js" async></script>
   <div id="pr-irlsnippet"></div>
   <script>
     window.pwr = window.pwr || function () {
       (pwr.q = pwr.q || []).push(arguments);
     };
     pwr("render", {
       api_key: '<API KEY>',
       locale: '<locale>',
       merchant_id: '<Merchant ID>',
       components: {
         IRLSnippet: 'pr-irlsnippet',
       }
     });
   </script>
5. Replace the following values with your specific information. Ensure when you update the values, you remove the carats.
- <API Key> with your provided API Key from PowerReviews
- <Locale> with your provided website Locale from PowerReviews (for example,
en_US) - <Merchant ID> with your provided Merchant ID from PowerReviews
Changing the Gallery Style via the Portal
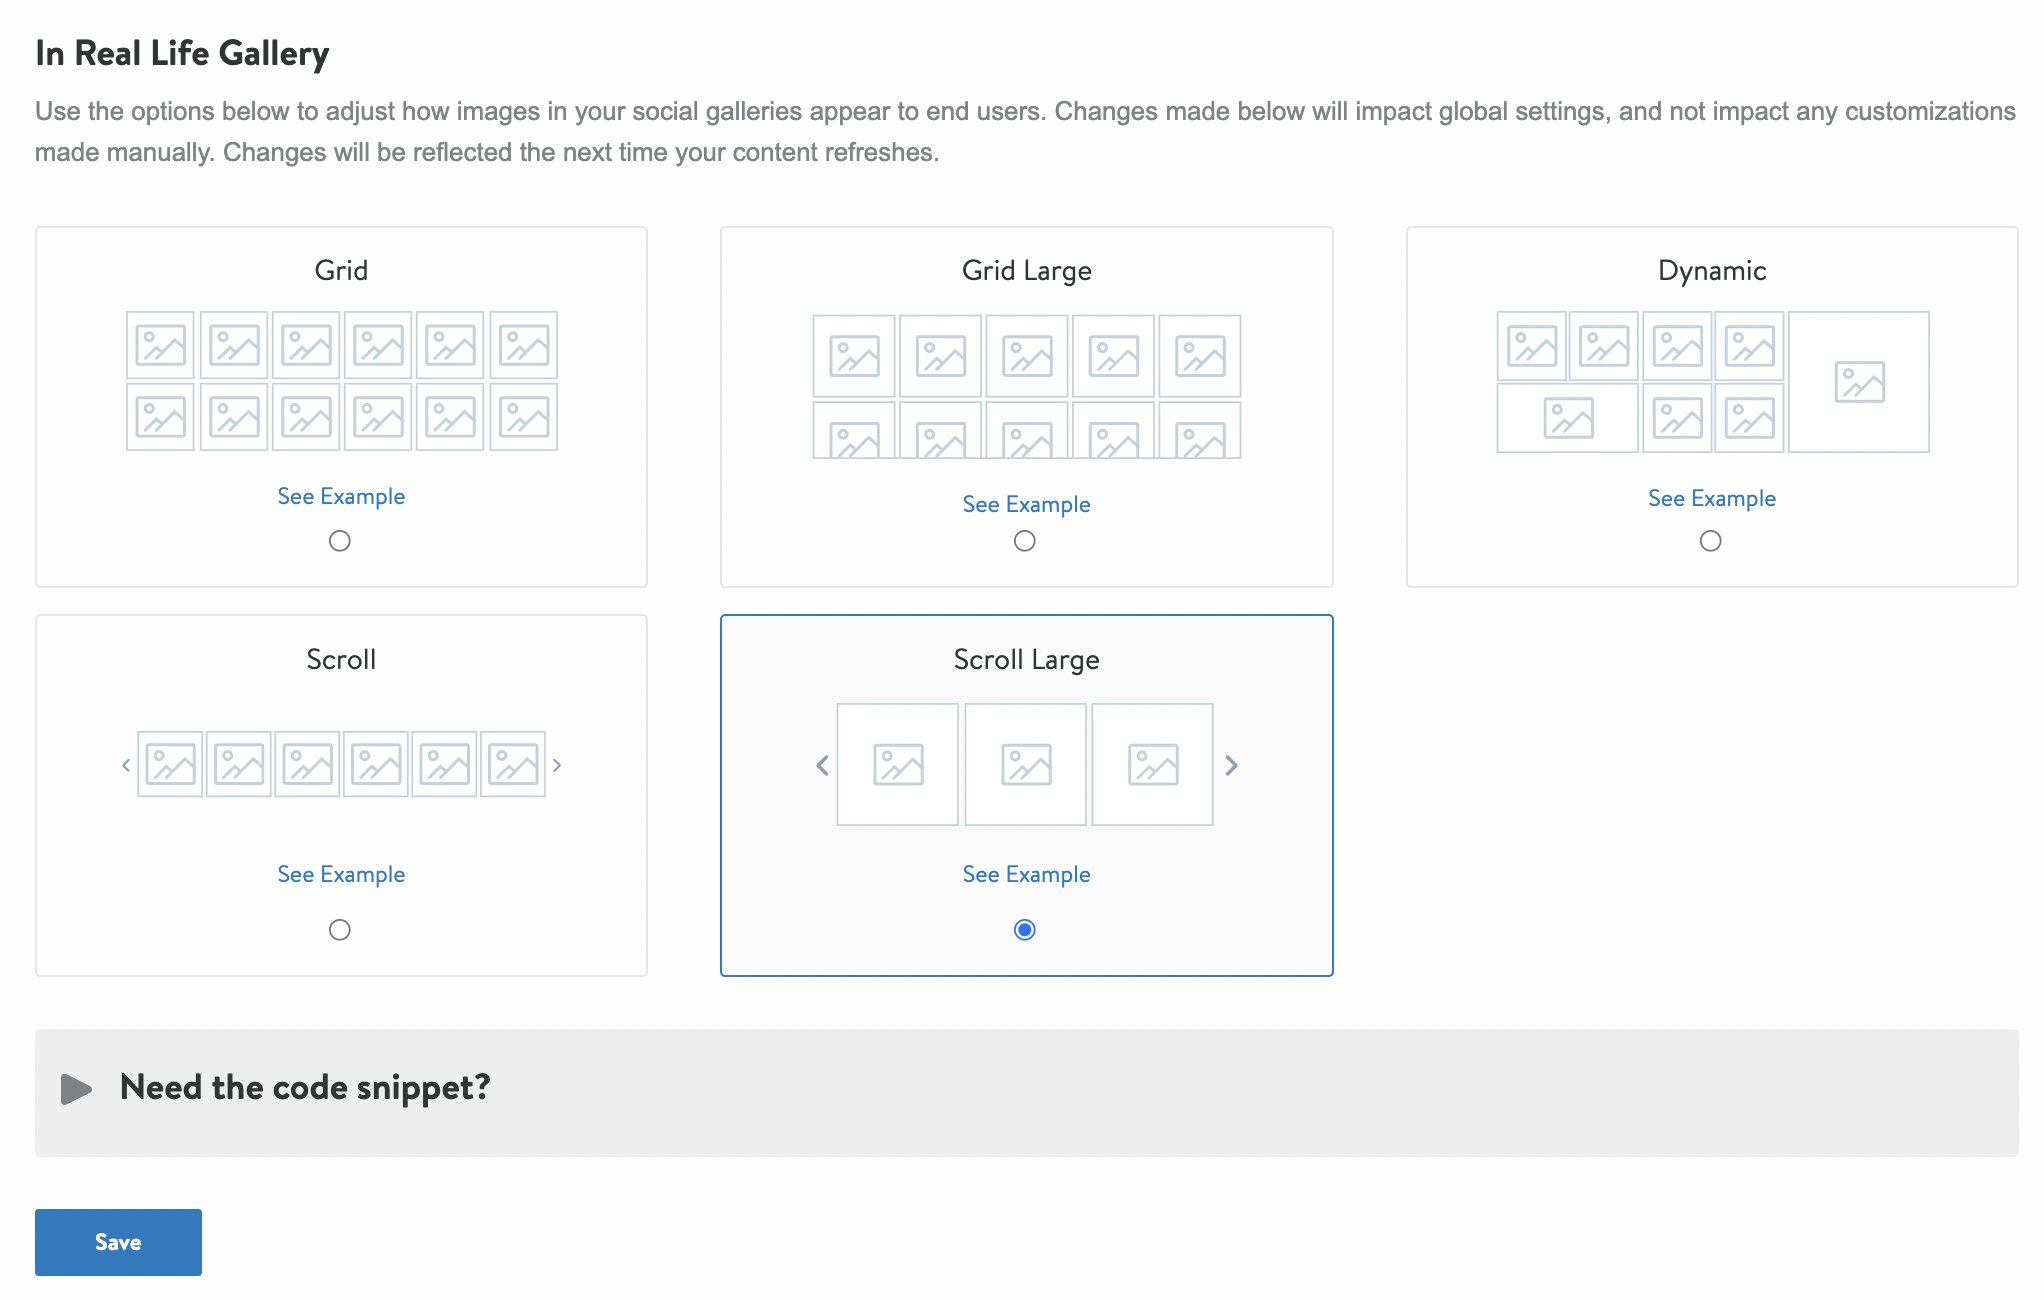
The IRL Gallery provides you with different options on how to display your image content.
Grid

Scroll

Dynamic

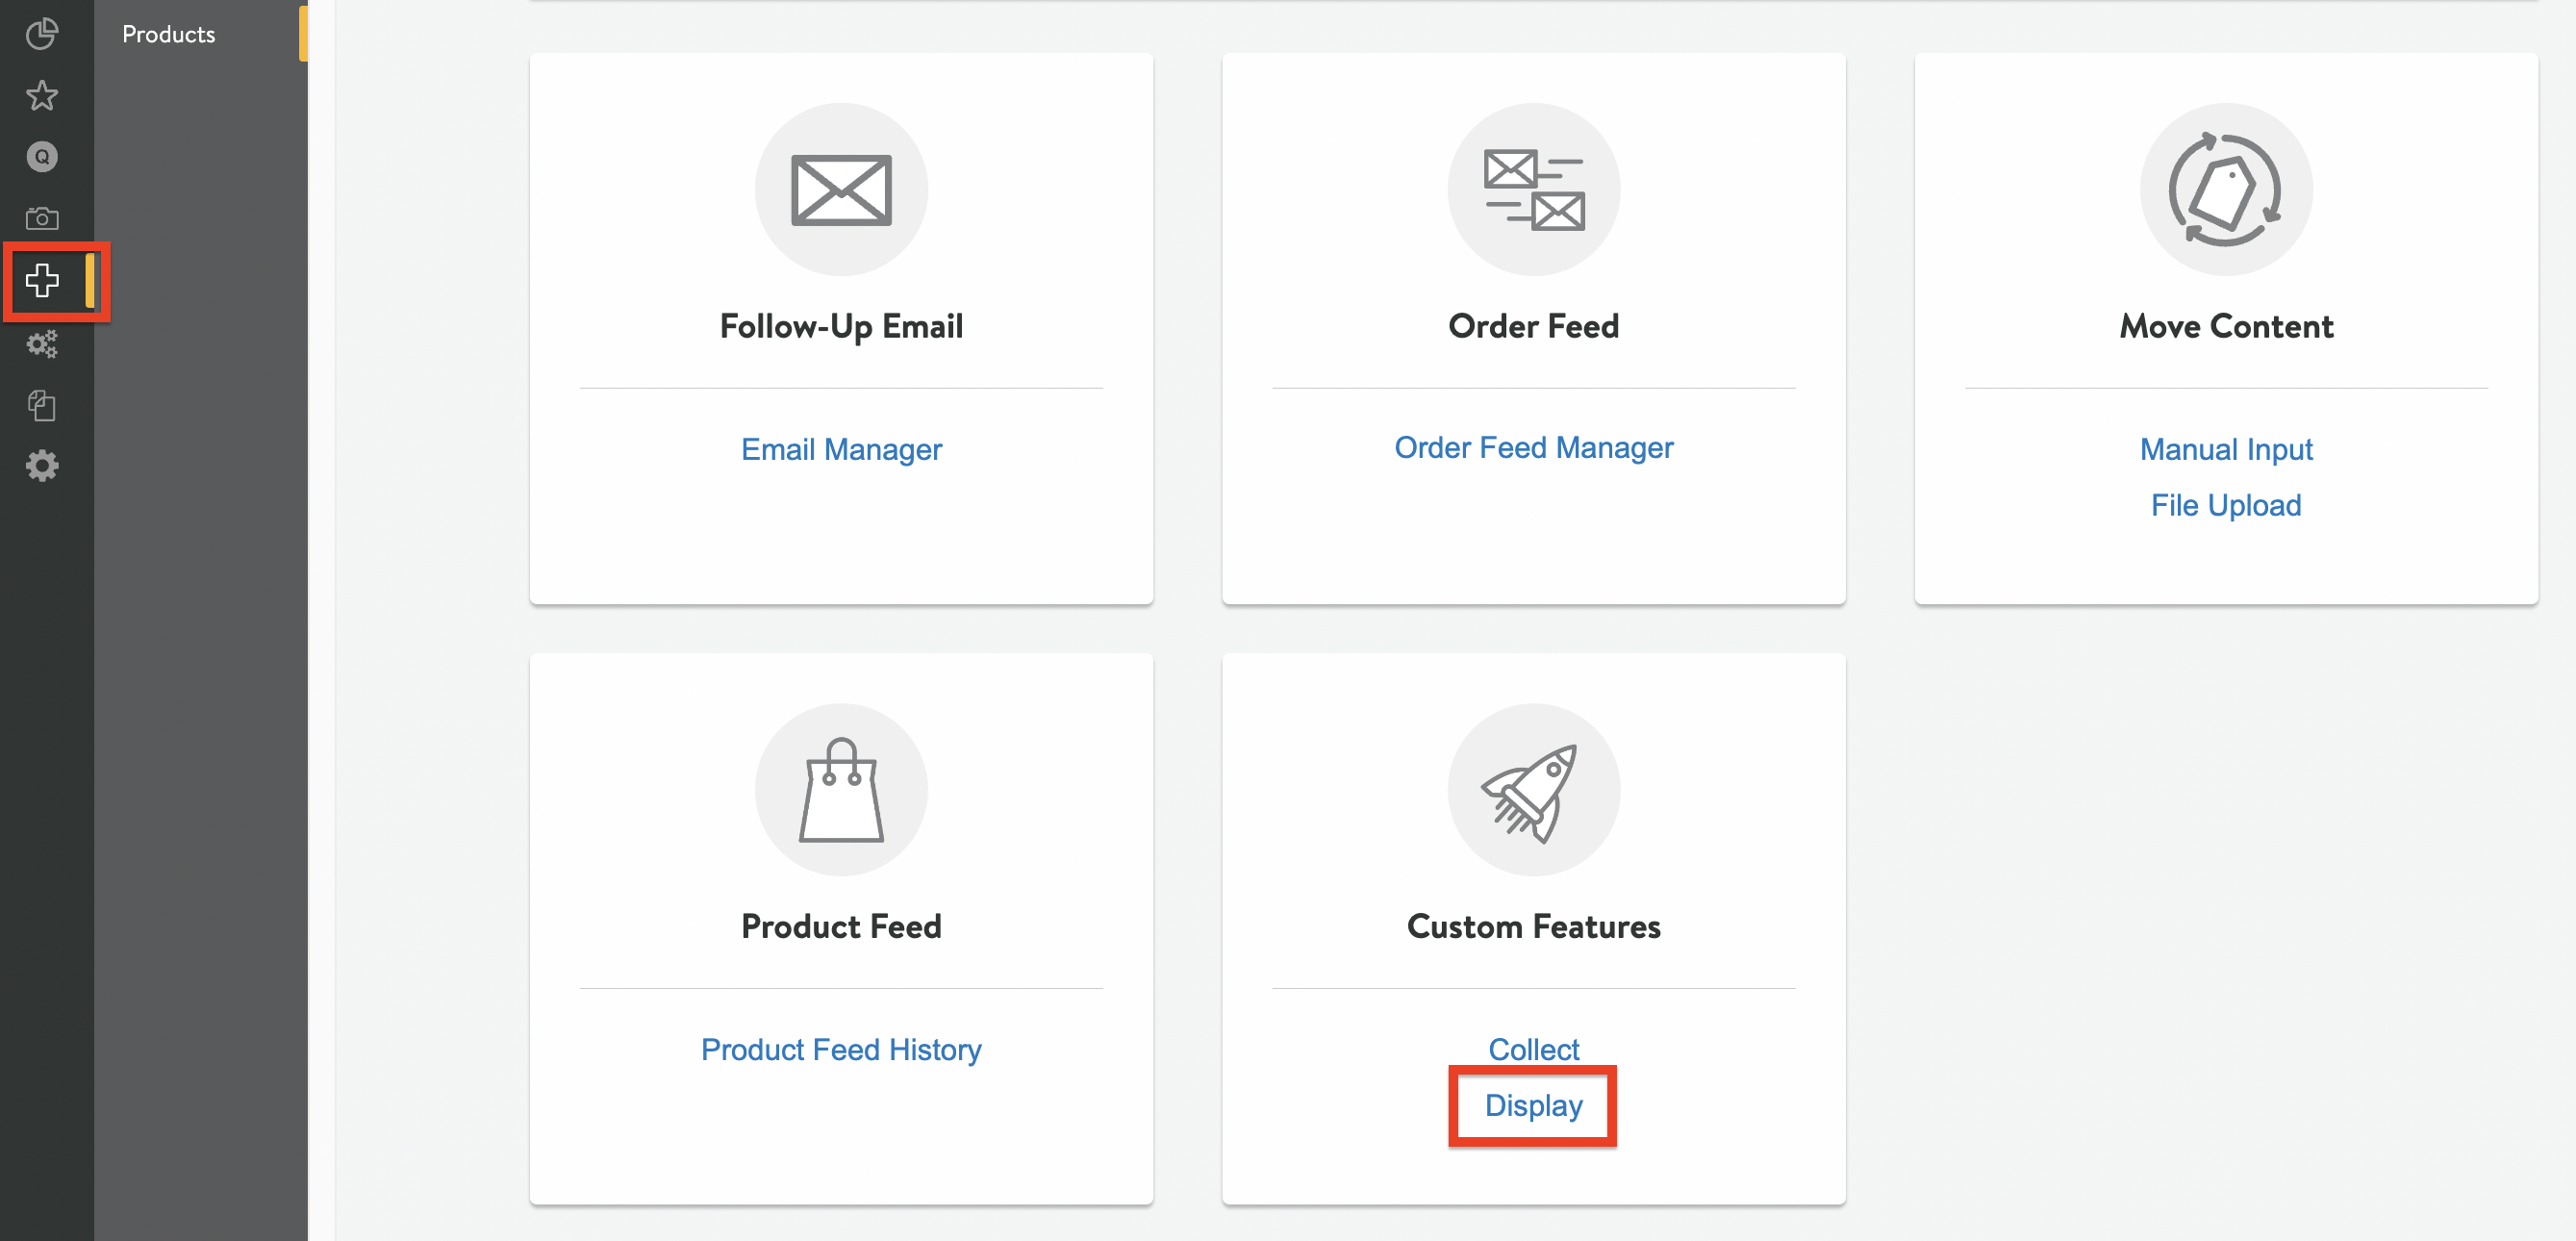
To enable or change your global gallery style:
1. Log into the PowerReviews Portal.
2. Click +Setup in the left navigation menu.
3. Click Display under Custom Features.

Under In Real Life Gallery, select the gallery style you'd like to use and Save your selection. Selections made in the Portal impact the global gallery settings, so if you've made specific customizations or overrides on any galleries, they will not be impacted. Changes will be reflected the next time your content refreshes.

Changing the Gallery Style via the JavaScript
Alternatively, you can add a config variable to your PowerReviews JavaScript code to change the gallery style. You will need to add the CD4_IRL_IMAGE_GALLERY_STYLE config variable and provide the gallery style value. These are the available options:
- CD4_IRL_IMAGE_GALLERY_STYLE: 'GRID',
- CD4_IRL_IMAGE_GALLERY_STYLE: 'GRID_LARGE',
- CD4_IRL_IMAGE_GALLERY_STYLE: 'SCROLL',
- CD4_IRL_IMAGE_GALLERY_STYLE: 'SCROLL_LARGE',
- CD4_IRL_IMAGE_GALLERY_STYLE: 'DYNAMIC',
Example
<script src="https://ui.powerreviews.com/stable/4.1/ui.js" async></script>
<div id="pr-irlsnippet"></div>
<script>
  window.pwr = window.pwr || function () {
    (pwr.q = pwr.q || []).push(arguments);
  };
  pwr("render", {
    api_key: '<API KEY>',
    locale: '<LOCALE>',
    merchant_id: '<MERCHANT ID>',
    CD4_IRL_IMAGE_GALLERY_STYLE: 'GRID_LARGE',
    components: {
      IRLSnippet: 'pr-irlsnippet',
    }
  });
</script>
The IRL Snippet can display both Social images (Instagram) and Native images (collected via the Write-a-Review form). To enable Native images, add IRL_SHOWNATIVE: TRUE to your configuration.
Hashtag and Category Image Galleries
Through IRL, you can display shoppable, socially curated image content for specific hashtags and/or category pages. This allows you to create custom galleries anywhere on your website to add very specific social proof and increase engagement.
To enable the IRL Gallery for a specific category or hashtag, add the following data attributes to your page's HTML element:
- data-pr-category
- You can only include one category
- The category you provide must match the category provided in your Product Feed/Feedless code
- The category should contain the full path, ie.: "clothing > tops > jacket"
- data-pr-hashtags
- You can include one or more hashtags (use commas to add multiple hashtags)
- Content containing at least one of the hashtags will be displayed
- Do not include the "#" symbol in front of the hashtags
- Do not include any whitespace
<div id="irlsnippet" data-pr-category="clothing > tops > jacket" data-pr-hashtags="rivnopowerrevieysjacket,yes"></div>
Add Your Photo
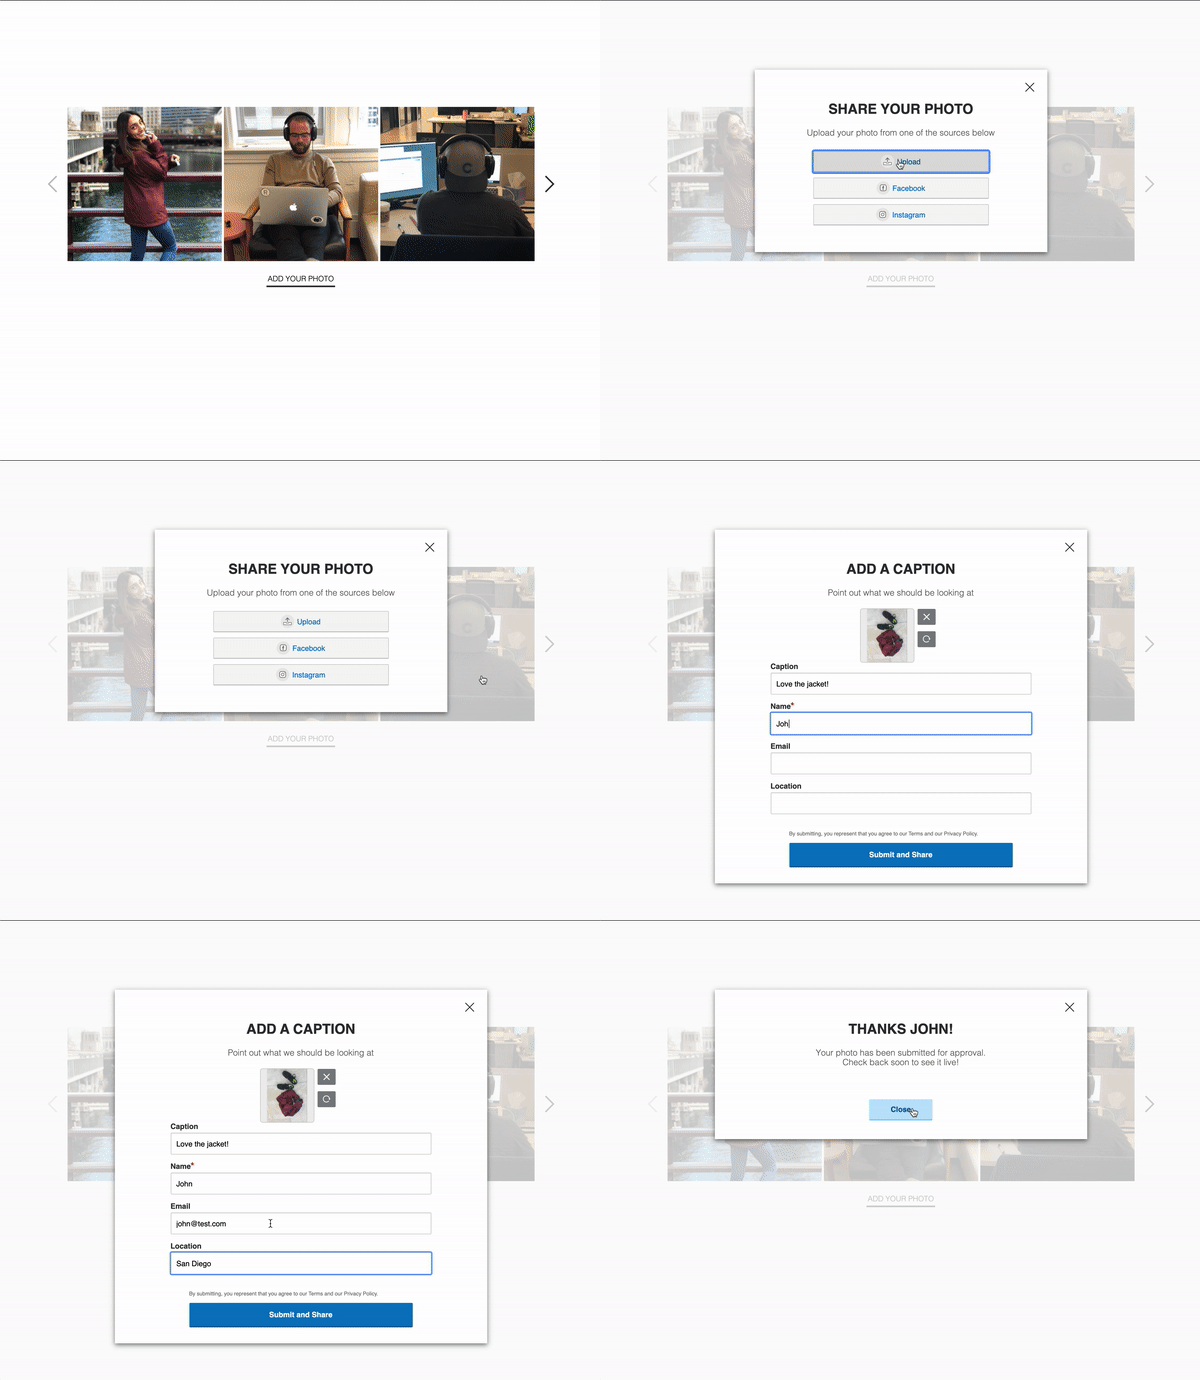
Enable your customers to submit imagery directly on your website, from their desktop, mobile device or social media accounts. The content uploaded via this widget will go through the same moderation process as the content collected via Instagram.
Users will have the ability to upload content via:
- An upload from their computer/mobile device

To enable the Add Your Photo feature, contact your Implementation Team or Account Team.
Adding the Shop All Page
1. Ensure this feature has been enabled for your account. If you are unsure, contact your Implementation Team or Account Team.
2. Identify where on your website you want this standalone landing page to appear.
3. Install the content container:
- Copy and paste the following HTML element into a new HTML page:
<div id="pr-irlsnippet"></div>
4. Install the IRL Snippet:
- Copy and paste the following code block on the page beneath the <div> you just created, but within the <body> tags.
Example
<script src="https://ui.powerreviews.com/stable/4.1/ui.js" async></script>

 <script>
  window.pwr = window.pwr || function () {
    (pwr.q = pwr.q || []).push(arguments);
  };
  pwr("render", {
     api_key: '<API KEY>',
     locale: '<locale>',
     merchant_id: '<Merchant ID>',
     components: {
        IRLSnippet: 'pr-irlsnippet',
     }
  });
</script>
5. Replace the following values with your specific information. Ensure when you update the values, you remove the carats.
- <API Key> with your provided API Key from PowerReviews
- <Locale> with your provided website Locale from PowerReviews (for example,
en_US) - <Merchant ID> with your provided Merchant ID from PowerReviews