To share data, PowerReviews uses a Client Application to enable Secure File Transfer Protocol (SFTP). SFTP is a standard network protocol used to transfer files between a client and a server over the internet or any other TCP/IP network.
To connect to PowerReviews via SFTP, you may use any one of a number of free SFTP Client Applications available. However, PowerReviews often recommends using FileZilla since it is free, commonly used, and easily available. If you choose to use FileZilla, complete the following instructions to connect to PowerReviews' SFTP.
If you do not have FileZilla installed, you can download it from the official FileZilla website at https://filezilla-project.org/index.php.
Note: This documentation is provided as a courtesy to assist PowerReviews clients in connecting to our SFTP, and we do not have any official connection to FileZilla. You may need assistance from your company's IT department to use this application, as there may be system or network policies that interfere with using this software. We recommend reaching out to your technical resources before proceeding. Any issues encountered with FileZilla should be directed towards their help site, as PowerReviews Technical Support is unable to assist with troubleshooting problems with the software.
Connecting to the Server
PowerReviews creates and provides clients an SFTP account on our sftp.powerreviews.com server to allow for transmission of data. This server only supports SFTP and FTPS, not FTP.
If you do not have your SFTP credentials, please contact your Implementation Team or PowerReviews Technical Support.
After launching your Client Application, you must connect to the server. For the purpose of this guide, we will use FileZilla's Quickconnect feature to connect to the server, found at the top of the application's window.
To begin, in FileZilla's Quickconnect:
1. Enter the following settings:
- Host: sftp.powerreviews.com
- Username: provided to you by PowerReviews
- Password: provided to you by PowerReviews
- Port: 22

2. Click Quickconnect to connect to the server.
If it is your first time connecting, your key is not saved to your system, so you may receive the following message:
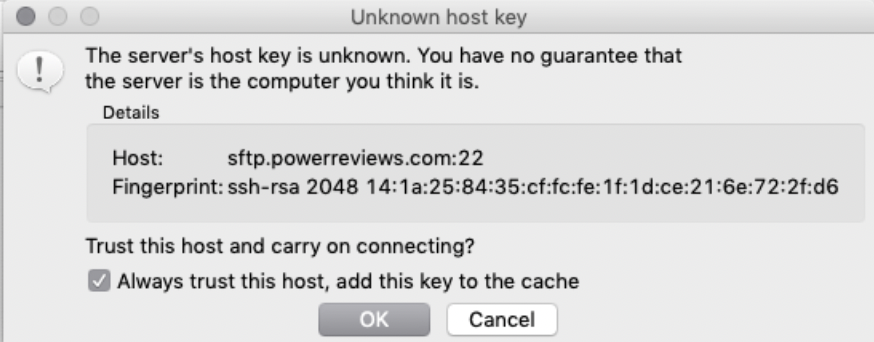
3. If this is the case, check the Always trust this host, add this key to the cache checkbox.
4. Click OK.
Once you are connected, both sides of the window will populate with data. The left-hand side is your local machine. The right-hand side is the server.
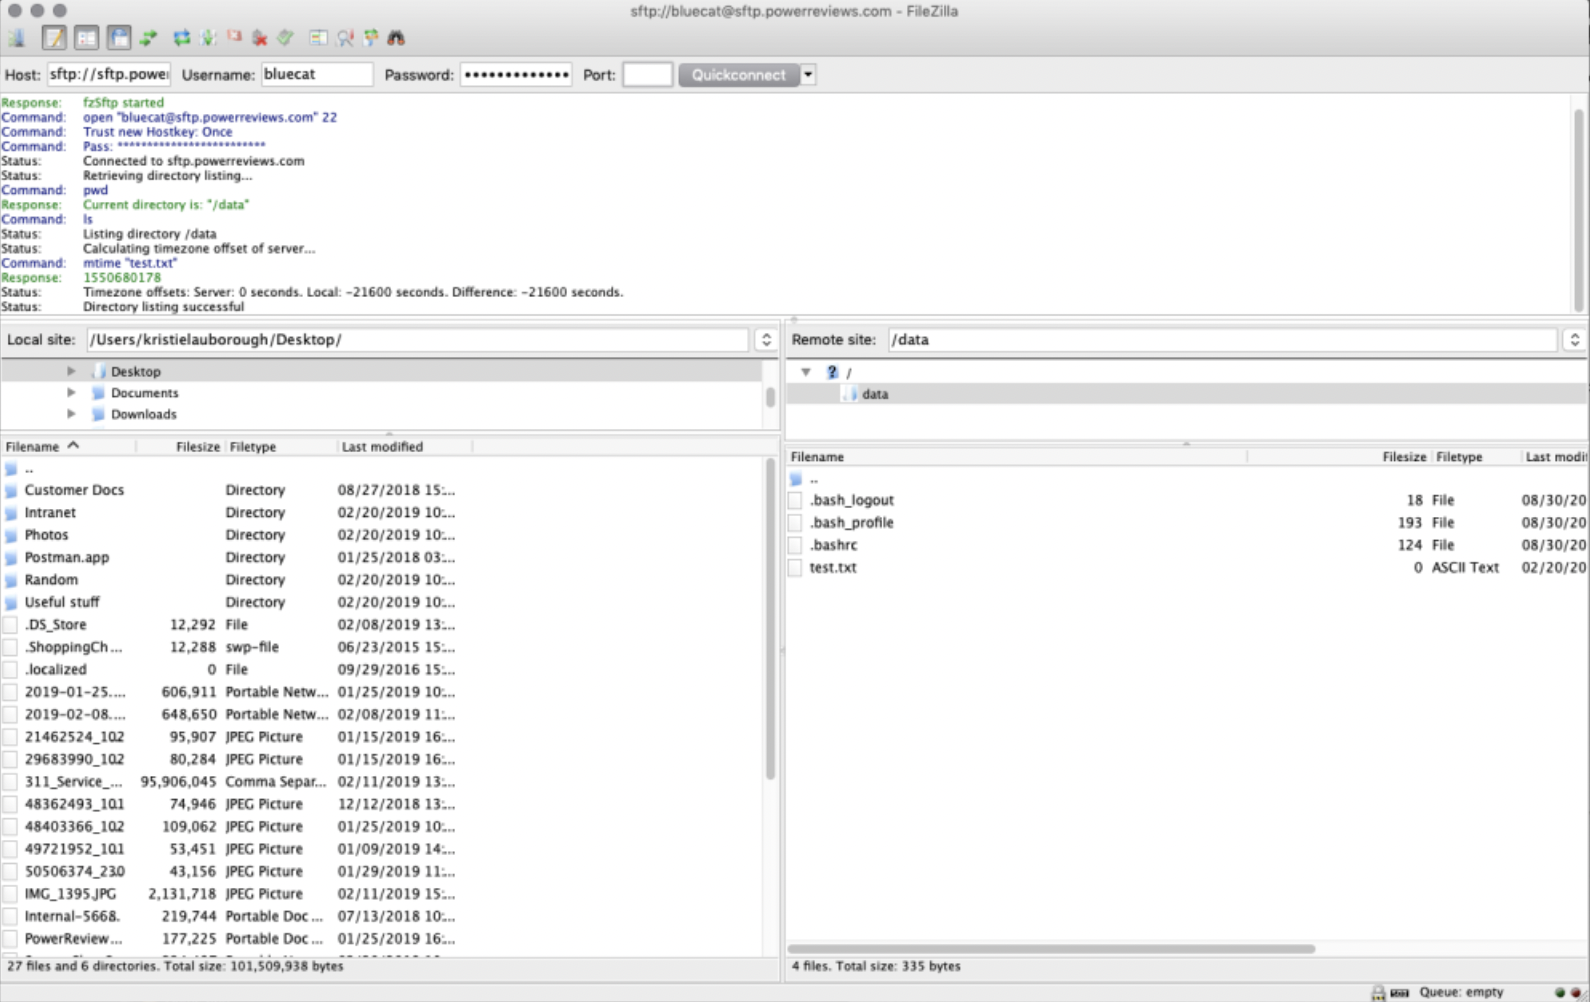
Now you are able to upload and download files by dragging and dropping.
Uploading
The local pane will bring the directory into view, which contains data to be uploaded. Navigate to the desired target directory on the server, using the server or remote pane's file listings. To upload the data, select the respective files or directories and drag them from the local pane (left-hand side) to the remote pane (right-hand side). You will notice that the files will be added to the transfer queue at the bottom of the window and soon thereafter get removed again (since they just uploaded to the server). The uploaded files and directories should now be displayed in the server content listing at the right-hand side of the window.
Note: If you don't like using the drag and drop, you can also right click on the files or directories in the lower local pane and select Upload to upload them or simply double click a file entry.
Downloading
Downloading files or complete directories works essentially the same way as uploading, just the other way around. Simply drag the files or directories from the remote pane (right-hand side) to the local pane (left-hand side).